In the world of digital marketing, email marketing remains one of the most effective ways to connect with your audience, build relationships, and drive conversions. There are numerous email marketing platforms available, each with its own set of features and capabilities. One such platform that has gained significant recognition is GetResponse. In this comprehensive guide, we will take you through a step-by-step tutorial on how to harness the full potential of GetResponse. From creating emails and landing pages to setting up automations and much more, this tutorial is your key to unlocking the immense power of this email marketing tool.
Must Read: Affiliate Marketing Tutorial For Beginners 2023 (Step by Step)
Creating Your GetResponse Account
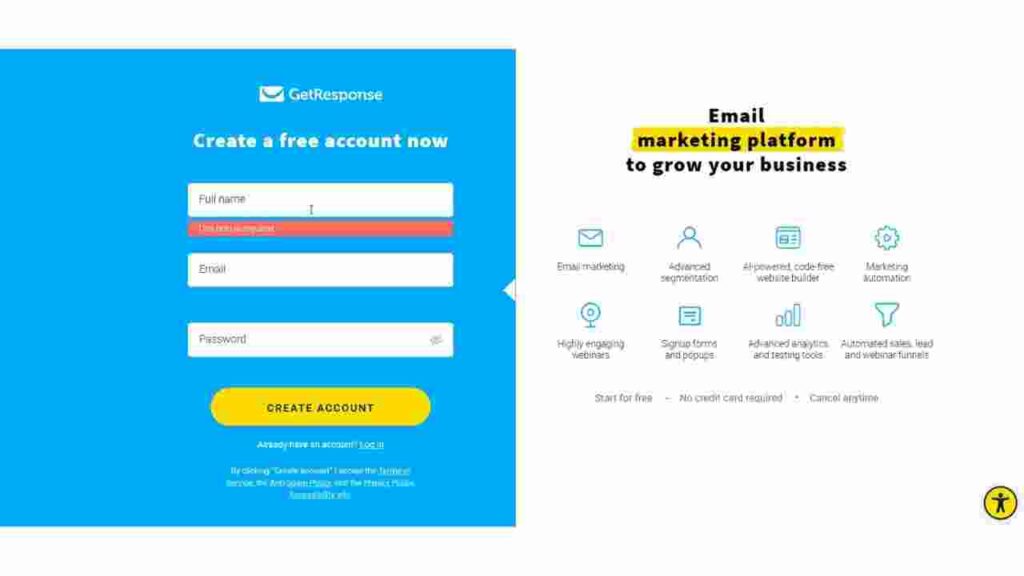

To embark on your journey with GetResponse, the first step is to create your account. Here’s how you can do it:
- Sign Up: Start by creating a free account on GetResponse. We have an exclusive 30-day free trial with full access to all GetResponse premium features. Simply click on the link provided at the end of this article to sign up.
- Pricing: GetResponse offers various pricing plans based on the size of your contact list. For instance, if you have up to 1,000 contacts, you can subscribe to the $19 per month plan. However, note that automation workflows are not included in the basic plan. You’ll need to opt for the marketing automation plan for that.
- Account Activation: After signing up, you will receive an activation email. Simply click on the activation link in your email, and your GetResponse account will be activated.
- Account Details: Provide your account details, including your country, address, and phone number. Your address is a legal requirement and will be included in every email you send.
Getting Started with GetResponse
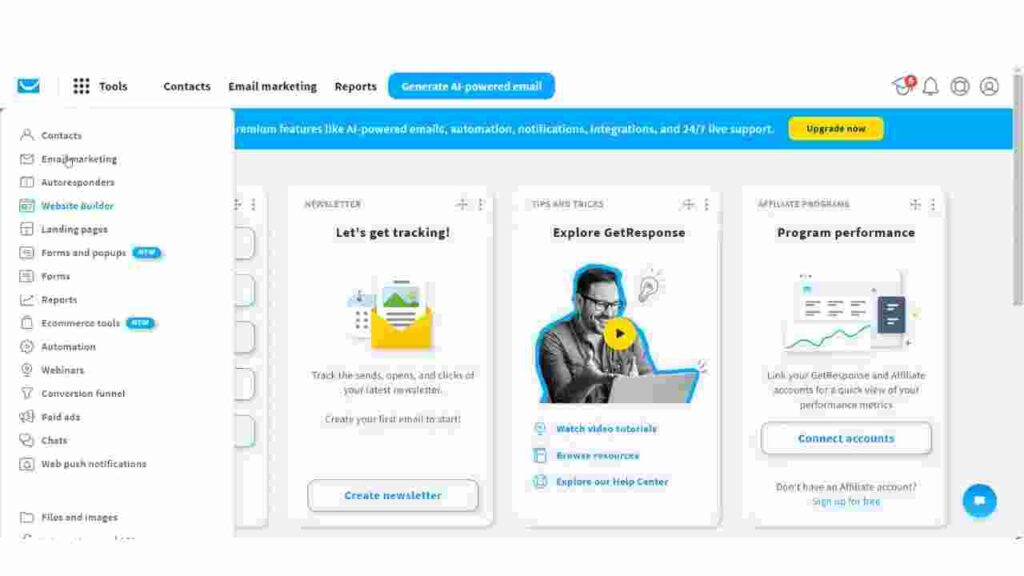
Once your account is set up, you will be directed to the dashboard. Here, you’ll find various features that GetResponse offers, including contacts, email marketing, autoresponders, and more. For this tutorial, we will focus on the essential features that most users commonly use.
Managing Contacts
Managing your contacts efficiently is crucial for a successful email marketing campaign. Here’s how you can get started:
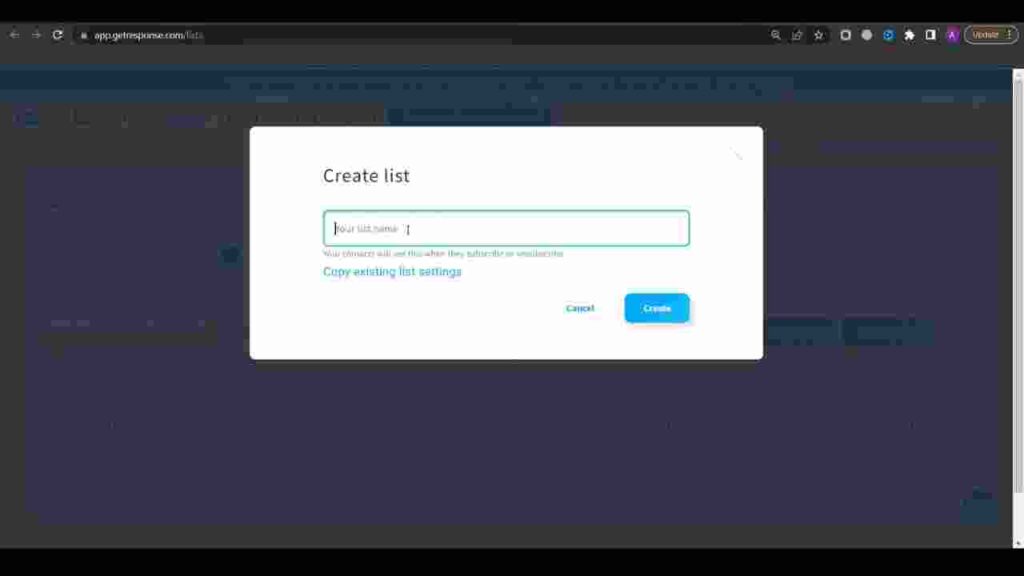
- Create a List: Begin by creating a new contact list with a distinct name. Please note that GetResponse doesn’t allow capital letters or spaces, so use underscores instead.
- List Settings: After creating your list, click on “Settings.” You can provide details such as a title, description, category, language, and even upload a logo. Ensure that you input your address, as it is legally required in all emails you send.
- Notification Settings: You can choose to enable or disable email notifications for each new subscriber, as well as the double opt-in option for added security.
- Importing Contacts: If you already have a list of subscribers, GetResponse allows you to import them easily. Click on your list, select “Add Contacts,” and follow the instructions.
Creating Sign-Up Forms
To build your email list, you’ll need sign-up forms that can be added to your website. Here’s how to create one:
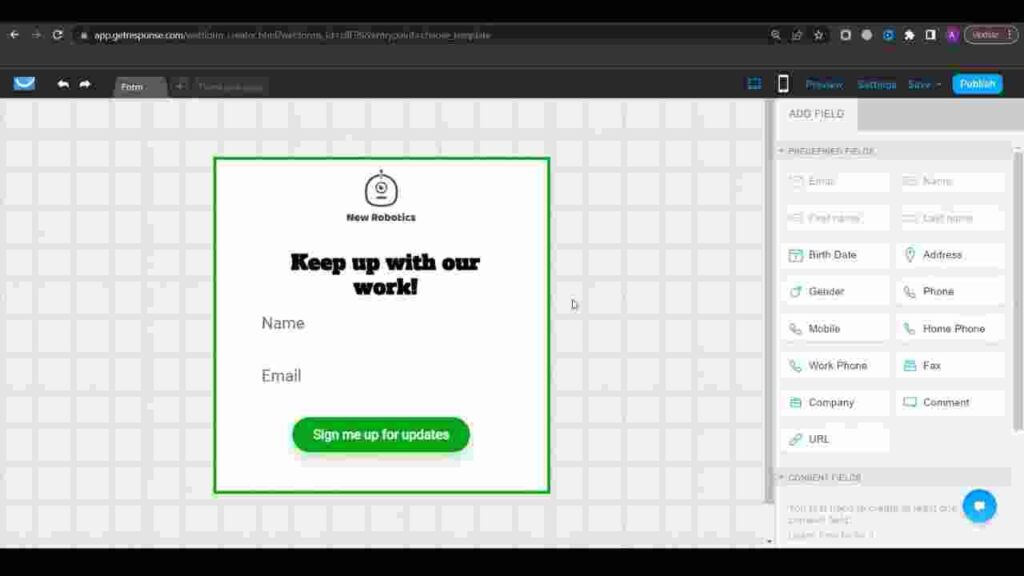
- Access Forms: Click on “Tools” and select “Forms.”
- Create a Form: Click on “Create Form.” GetResponse offers a range of templates to choose from. You can select a template and customize it according to your needs.
- Customization: Customize the form to match your branding by adding a logo, changing text, adjusting fonts, and colors. You can also add or remove elements as necessary.
- Publish: Before publishing the form, don’t forget to configure the settings, including selecting the list to which subscribers will be added and specifying the thank you page.
- Get the Code: After saving and publishing the form, you’ll receive an HTML code that you can add to your website or landing page to start collecting subscribers.
Creating Landing Pages
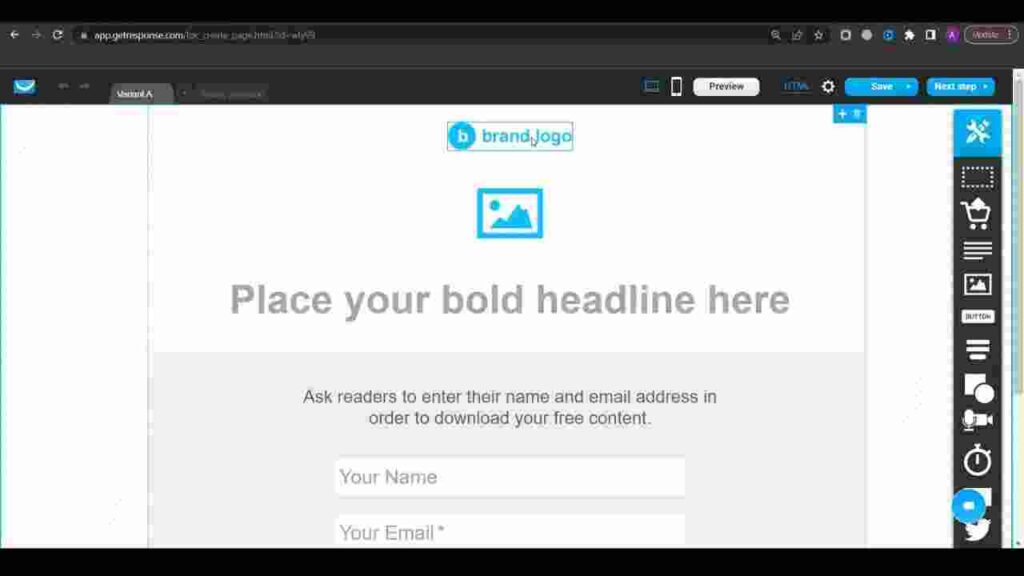
Landing pages are crucial for converting visitors into subscribers. Here’s how to create a landing page using GetResponse:
- Access Landing Pages: Click on “Tools” and select “Landing Pages.”
- Create a Landing Page: Click on “Create a Landing Page” and choose a template or create one from scratch.
- Customization: Customize the landing page by adding your logo, changing text, and selecting the design elements that match your brand. GetResponse provides you with a user-friendly drag-and-drop editor.
- Settings: Configure the landing page settings, including adding a description, selecting your list, and choosing whether you want search engines to index it.
- Thank You Page: You can specify a custom thank you page or direct subscribers to a particular URL after signing up.
- Publish: Once your landing page is ready, click “Publish.” GetResponse will provide you with a link that you can share or embed on your website.
Setting Up Autoresponders
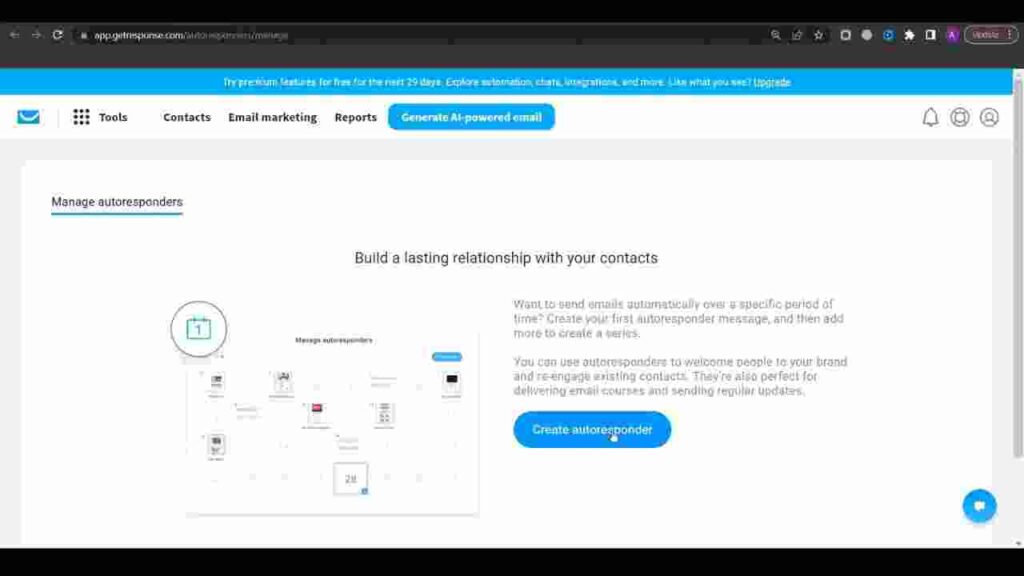
Autoresponders are a powerful tool for automating email marketing campaigns. Here’s how you can create a follow-up series:
- Access Autoresponders: Click on “Tools” and select “Autoresponders.”
- Create Autoresponder: Click on “Create Autoresponder.”
- Configuration: Give your autoresponder a title, select the list, and specify when it should start sending emails.
- Design Your Emails: Create your emails, including subject lines, content, and design. You can add delays between emails for a well-paced campaign.
- Tags: Use tags to categorize subscribers and customize their journey based on their interactions.
- Save and Publish: Once your autoresponder series is ready, click “Save and publish” to make it active.
Creating Automated Workflows

If you want to take your email marketing to the next level, GetResponse offers automated workflows to create more complex and customized email campaigns. Here’s how to create an automated workflow:
- Access Automation: Click on “Tools” and select “Automation.”
- Create Workflow: Click on “Create Workflow.”
- Workflow Configuration: Give your workflow a name and choose the trigger. You can set it to start when a new subscriber is added to your list.
- Adding Elements: You can add various elements like sending emails, adding delays, applying tags, and more. These elements allow you to craft a personalized journey for your subscribers.
- Customization: Customize each element to fit your campaign’s goals and strategy.
- Save and Publish: Once your workflow is complete, click “Save and publish” to activate it.
Must Read: How To Use SEMrush For SEO And Keyword Research | SEMrush Tutorial
Conclusion
GetResponse is a robust email marketing platform that offers a wide array of features to help you create, manage, and automate your email campaigns. By following the steps in this guide, you’ll be well on your way to mastering the art of email marketing and using GetResponse to its full potential.
Whether you’re a business owner looking to expand your customer base, a marketer aiming to boost engagement, or an entrepreneur seeking to increase conversions, GetResponse can be a valuable asset in your digital marketing toolkit. Start your 30-day free trial today and experience the power of effective email marketing with
FAQ
Q1: What are the benefits of using GetResponse for email marketing?
GetResponse offers an all-in-one email marketing solution, simplifying list management, form creation, landing page design, and automation workflows.
Its user-friendly interface makes it accessible to beginners while providing advanced features for more experienced marketers.
The platform allows for efficient and targeted email campaigns.
Q2: Can I import existing email lists into GetResponse?
Yes, you can easily import your existing contacts into GetResponse by selecting your list and clicking “Add Contacts.” You can choose to add them manually or upload a CSV file.
Q3: What is the advantage of automation workflows over traditional autoresponders?
Automation workflows provide more flexibility and complexity in managing your email marketing. You can set up conditional triggers, add tags, segment your subscribers, and create intricate sequences, allowing for highly personalized and effective email campaigns.
Q4: Can I use my own domain with GetResponse landing pages?
Yes, you can use your own domain with GetResponse. Simply click on “Add a New Domain” and follow the instructions to configure it.
Q5: Is GetResponse suitable for both small businesses and large enterprises?
Yes, GetResponse caters to businesses of all sizes. Its pricing plans and features are scalable to meet the needs of both small businesses and large enterprises.
Q6. What is the cost of a GetResponse subscription?
GetResponse offers various pricing plans, including a basic plan starting at $19 per month for lists of up to 1,000 contacts. Pricing may vary based on the number of subscribers and features required.


![How to Convert Figma to Elementor for FREE 2024? [3 Steps]](https://themtvhustle.com/wp-content/uploads/2023/12/How-to-Convert-Figma-to-Elementor-for-FREE-2024-3-Steps.webp)